Wednesday, July 27, 2011

Healthy Zucchini Bread.


Once again, my family is growing delicious fruits and vegetables in our garden. This year, however, we have more then we can handle! Our zucchini grew so big that one can lasts us a week! So, I thought, what can I use this zucchini for so I don't waste it? Zucchini bread! Yet again I got to searching those zucchini bread recipes and finally came up with one that is both healthy and oh so delicious!

Zucchini Bread

3/4 cup low-fat milk
2 large eggs
3/4 cup sugar
1/3 cup canola oil
1 teaspoon vanilla extract
2 cups shredded zucchini
2 cups white whole-wheat flour
2 teaspoons baking powder
1 1/2 teaspoon ground cinnamon
1/2 teaspoon salt

Preheat oven to 350°F. Coat a 9-by-5-inch loaf pan with cooking spray.
Whisk milk, eggs, sugar, oil and vanilla in a medium bowl. Stir in zucchini. Combine flour, baking powder, cinnamon and salt in a large bowl; stir in the wet ingredients until just combined. Transfer the batter to the prepared pan.
Bake until golden brown; about 50 minutes. Cool in the pan for 10 minutes, then turn out onto a wire rack. Let cool for at least 1 hour before slicing. Sprinkle with powdered sugar while still warm.

Each slice contains about: 197 calories; 7 g fat ( 1 g sat , 4 g mono ); 32 mg cholesterol; 29 g carbohydrates; 13 g added sugars; 4 g protein; 2 g fiber; 209 mg sodium; 108 mg potassium.

Now that's what I call delicious! Enjoy!


Friday, July 22, 2011

Thanksgiving in July.

I've recently become a huge fan of pumpkin. Last Thanksgiving my mom showed me a recipe for Maple Pumpkin Cheesecake and I knew it was going to be a real crowd pleaser! At first I thought the pumpkin might be a bit over powering, but it paired perfectly with the maple syrup. Not only was the cheesecake absolutely delicious, but it was so beautiful that we all felt guilty cutting into it!


(This was the cheesecake before the Maple Walnut Glaze.)


(After pouring on the glaze!)
 
Maple Pumpkin Cheesecake

1 1/4 cups Graham Cracker Crumbs.
1/4 cup sugar.
1/4 cup butter, melted.
3 (8 oz.) packages cream cheese, softened.
1 (14 oz.) can Sweetened Condensed Milk.
1 (16 oz.) can pumpkin.
3 eggs.
3/4 cup pure maple syrup.
1 1/2 tsp. cinnamon.
1 tsp. nutmeg.
  Maple Walnut Glaze
       (recipe follows)

1. Heat oven to 300 degrees. Combine crumbs, sugar, and butter; press firmly on bottom of 9-inch springform pan.

2. With mixer, beat cream cheese until fluffy; gradually beat in sweetened condesed milk until smooth. Add pumpkin, eggs, 1/4 cup maple syrup, cinnamon, and nutmeg; mix well. pour into prepared pan.

3. Bake 1 hour and 15 minutes or until edge springs back when lightly touched. Cool and chill.

MAPLE WALNUT GLAZE:Combine 2 tablespoons water and 4 teaspoons cornstarch. In small sauce pan, melt 2 tablespoons butter. Add remaining 1/2 cup maple syrup and corstarch mixture; cook and stir until slightly thickened. Add 1/2 cup chopped walnuts. Cool slightly. Spoon over cheesecake.

Rum Cupcakes with Vanilla Buttercream.


A friend of mine had been begging me to make him rum cupcakes for the longest time (maybe even about a year now) and today was the day I finally got down to it! I was a little skeptical at first since I have never made a rum cake before and I was not sure how a rum cake recipe would work in cupcake pans, but overall, it turned out to be one of the best baking experiences ever! The frosting was so creamy and delicious, but I would advise you to double the recipe because I ran out towards the end and I like to use ALOT of frosting. I also had alot of batter left over and decided to make mini cupcakes which are perfect for a little snack in case you don't want to over indulge on the larger ones.

So, Chris, these cupcakes are for you! I know it took a little longer then it should have, but I really think you're going to like them! Enjoy!!!

Rum CupCakes:

3 cups all-purpose flour
2 cups sugar
1 tablespoon baking powder
1/2 cup butter
4 eggs
1 3.4-ounce package (dry) instant vanilla pudding
1 1/2 cups milk
1 1/2 teaspoons vanilla
1/2 cup dark rum

Combine all the ingredients together in a large bowl. Mix at medium speed for two minutes. Be sure not to overbeat! Pour into muffin cups. Place in a 350-degree oven. Bake for 20-22 mins or until toothpick inserted comes out clean. Cool completely.
*For mini cupcakes: Bake at 350 degrees for about 8 mins.


Classic Vanilla Buttercream
 1 cup unsalted butter, softened
3 cups confectioners sugar, SIFTED!
1/4 teaspoon table salt
1 tablespoon vanilla extract
2 tablespoons milk
 
Beat butter for 2 minutes with a mixer on medium speed. Add 3 cups of powdered sugar and turn mixer on the lowest speed. Mix until the sugar has been incorporated with the butter. Increase mixer speed to medium and add vanilla extract, salt, and 2 tablespoons of milk and beat for 3 minutes.  

Thursday, July 21, 2011

U2 Concert and a Delicious Cookie!

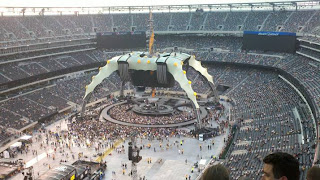
Last night me and my mom went to see U2! Ahhh it was such a great night! But, besides being serenaded by the one and only Bono for 2 and a half hours, I had to sample one of the Mrs. Field's Cookies that the vendors were selling all around the new Meadowlands Stadium! Soft, gooey, and so delicious! I think I might just have to clone these wonderful works of art! But for right now, I'll just share the picture I had to take of the cookie before I work on the recipe!


(Not to mention, the chocolate chips had melted a bit since it was about 100 degrees!)


(Yes, we were a bit high up there, but it was still an amazing night!)


(Bono has put on another great show yet again!)


Wednesday, July 20, 2011

Chocolate Chip Scones.

Any chance I get, I try to incorporate chocolate chips into my creations. So, once again, I've tossed some chocolate chips into this scone recipe, which usually calls for raisins. I also recommend serving these scones with clotted cream and jam. For those of you who don't like jam, like myself, it's worth a try! The cream and jam pair perfectly to give these scones a moist, and very delicious flavor!


Chocolate Chip Scones

1 3/4 cups all-purpose flour
1/3 cup white sugar
2 teaspoons baking powder
1/2 teaspoon salt
5 tablespoons unsalted butter, chilled and cubed
1/2 cup miniature semisweet chocolate chips
3 tablespoons orange juice

Preheat oven to 400 degrees F. Spray a baking sheet with nonstick cooking spray.
In a large bowl, whisk together the flour, sugar, baking powder and salt. With a fork, cut in the butter until the mixture resembles coarse crumbs. Stir in the chocolate chips. Mix in the orange juice to form a dough. Turn out the dough on a floured surface. Roll into about a 9 inch circle about 1/2 inch thick. Cut dough into equal sized wedges. Transfer the scones to the baking sheet. Bake in preheated oven until golden brown, about 12 minutes. Move to wire racks to cool. Serve with clotted cream and jam!

Tuesday, July 19, 2011

London, England Bakeries!

On my recent trip to London, England, I had to visit a few of London's finest bakeries. London, being the most beautiful city in the entire world!, also has some of the most beautiful bakeries and baked goods. During my frequent bakery searches, I came across some bakeries that really stood out. The first one was called Primrose Bakery. Primrose Bakery had to be the smallest place I've ever seen, but they could make one heck of a cupcake! I had the pleasure of tasting their Oreo Cupcake, which, honestly, couldn't have been more delicious!

 (I wish I took a picture of my cupcake, but it was gone in no time!)

Anyway... the next bakery I came across was called Candy Cakes. This place is a real eye-catcher! Bright blue, bright pink, bright yellow and green! You just couldn't pass it up, and I'm so glad I didn't! The cupcake menu was endless! Being a banana and toffee lover, I had the pleasure of sampling one of London's finest flavors, Banoffee (banana toffee).


Ahhh.... and now let me tell you about what I like to call "A Dream Come True"- Harrod's Department Store. Unlike most department stores, Harrod's is one of a kind. What's better then shopping and eating all at the same time? Um....nothing comes to my mind! Harrod's has its very own floor dedicated to food! This floor is also known as the "Food Hall". Meats, sandwiches, meals-to-go, desserts, desserts, desserts, and also some more desserts! Being the baker that I am, I tend to notice the sweets more then anything else. So, my camera and I took a little tour of the Food Hall and captured some of these great pictures!


And last, but not least, Camden Market and Covent Garden. Camden Market is a very unique market, held on the weekends, that is filled with the most random, yet exquisite things. For example, the huge Donut Cart!


Covent Garden was another market filled with shops and entertainment. Covent Garden was the location of Candy Cakes and a few other bakeries and sweet shops.


Well that about does it! The best vacation of my life! Not to mention, I was there for the Royal Wedding! Such an exciting week and also a very delicious week! London is by far one of the best cities for those of us with a sweet tooth!

Monday, July 18, 2011

50th Birthday Cake

This past Halloween my mom turned 50. Every year I tell my mom to pick out any kind of cake she wants and I will be more then happy to make it for her. This birthday, however, we had a huge party with the whole family. The pressure was on this time! I had to make a huge sheet cake for more then 20 people! So, my mom got to thinking and the cake she came up with was: Vanilla cake, Nutella filling, and the most delicious Fudge Frosting you can ever imagine! I took this into consideration and created one of the best cakes I've ever made in my life! For the first time, I experimented with making roses out of frosting, which I must say, came out pretty great! It was such a relief when everyone liked the cake! And of course, I had to take pictures! Check it out!!!

Saturday, July 16, 2011

Seriously One of the BEST Cookies I've Ever Had!

1/2 cup (1 stick) unsalted butter
1 cup granulated sugar
1/2 cup light brown sugar
1/4 cup unsweetened hazelnut paste* or peanut butter
2 large eggs
1 vanilla bean, split lengthwise, pulp scraped out, or 1 tsp. vanilla extract.
2 1/3 cups flour
1 teaspoon baking soda
1 teaspoon salt
12 ounces bittersweet chocolate, chopped into 1/4-inch pieces or larger
*1/2 cup chopped nuts (optional).

1. Heat the oven to 375 degrees. Line baking sheets with parchment paper. In the bowl of an electric mixer fitted with a paddle attachment, cream the butter and sugars. Add the hazelnut paste or peanut butter, beating until smooth. Beat in the eggs and the vanilla bean pulp or extract, scraping down the bowl as needed.

2. In another bowl, sift together the flour, the baking soda and the salt. Gradually add the dry ingredients to the butter mixture, and combine at low speed until the dough comes together. Mix in the chocolate pieces and, if desired, the nuts. Drop heaping tablespoons of the dough 2 inches apart onto prepared cookie sheets, flattening them slightly by hand.

3. Bake until lightly browned, 9 to 12 minutes. Cool the cookie sheets on a wire rack before removing the cookies.

*Hazelnut paste is a paste made from roasted and ground hazelnuts. To make: Roast nuts slightly in oven; let cool; ground in food processor.

*Personally, I don't like to use nuts when baking, especially when a recipe calls for hazelnut paste or peanut  butter. When using peanut butter, it gives the cookies a natural nut flavor, which will over power the cookie if you add more nuts. But, of course, feel free to add more if you would like!

Wednesday, July 13, 2011

Go Bananas!

For those of you who love bananas, this recipe is for you! Banana's Foster Bars are so delicious and literally melt in your mouth! Yes, they take some time, but so so so worth it in the end. Below I've posted the recipe, so leave your comments and enjoy!!!

Banana's Foster Bars

Preheat oven to 325F (racks set to the middle and near top)
Line 9x13 pan with parchment paper

Shortbread
1 cup + 5 tbsp. butter, melted
3/4 cup sugar
3/4 tsp salt
2 egg yolks
3 cups + 3 tbsp flour

Melt butter, set aside until cool. Mix butter and sugar together. Whisk in egg yolks. Stir salt into flour. Mix into butter mixture until combined. Transfer 2 cups of dough to the prepared pan & press evenly. Prick dough with a fork. Refrigerate for 30 min.
For the topping, mix 1/4 cup sugar with the remaining dough & crumble together. (This is to make a nice crumbly crust after pouring the banana filling on the cookie... but we'll get to that later!)

Banana Filling
3 bananas
1/4 cup butter
3/4 cup brown sugar
1/4 tsp cinnamon
1/2 cup dark rum
Over low heat, melt butter, sugar and cinnamon stirring until almost dissolved. Add sliced bananas and saute. Turn slices over once. Add rum and heat through - boil or flambe until the sugar is fully dissolved. Mash or cut bananas into small pieces. Take out 1/4 cup of the rum sauce and mix into banana mixture. Heat the remaining rum sauce, bring to a boil and reduce down slightly and add the rest of the rum mixture with the mashed bananas. Take pan out of the refrigerator and bake in the middle of the oven for 18 mins. until slightly brown on the edges. Increase temp. to 350F. Spread banana mixture over hot crust. Scatter remaining dough on top. Bake on the near top rack 25+ min. until top is browned. Cool 1 hour. Cut into bars.
I've made this recipe multiple times and loved it every time! I try to incorporate bananas into all of my baked goods so this was the perfect cookie for me!

Wednesday, July 6, 2011

Cake Batter Truffles

Cake batter? GOOD! Truffles? EVEN BETTER! I came across this recipe on my daily "dessert search" and had to give them a try. They were so simple to make and even better to eat! The truffles are no bake so we don't have to worry about turning on the oven in this hot weather. I prefer to use Baker's Semi Sweet chocolate bars for coating, but of course, you can use anything you want! The recipe calls for yellow cake mix, but, once again, you can use any cake mix. If you do use another kind of cake mix flavor, please let me know how they turn out!

Cake Batter Truffles:
1 ½ cups flour
1 cup yellow cake mix
½ cup unsalted butter, softened
½ cup white sugar
1 teaspoon vanilla
1/8 teaspoon salt
3-4 Tablespoons milk

Truffle Coating:
16 ounces (8 squares) Baker's Semi Sweet Chocolate
4 Tablespoons yellow cake mix

Beat together butter and sugar using an electric mixer until combined. Add cake mix, flour, salt, and vanilla and mix thoroughly. Add 3 Tablespoons of milk or more if needed to make a dough consistency. Roll dough into one inch balls and place on a parchment or wax paper lined cookie sheet. Chill balls in the refrigerator for 15 minutes to firm up.

While dough balls are chilling, melt Baker's Semi Sweet Chocolate in the microwave in 30 second intervals until melted. Stir between intervals. Once melted, quickly stir in cake mix until incorporated completely. Using a fork, dip truffles into melted chocolate. Place truffle back on the cookie sheet repeat with remaining balls until finished.

Chill cake batter truffles in the refrigerator until serving. Makes around 24-30 truffles.

One Girl, One Blog, and a Ton of Sweets!

So for years I have occupied my time reading blogs and searching the web for recipes. I have quite the collection of my own recipes that are just too yummy not to share with the world! Yes, I am fairly new to blogging but I figured why not give it a go! So here it is ladies and gentlemen! A blog not only about dessert but the life of a baker!